

When managing a complex Salesforce data model, it can get tricky to visualize how different objects connect with each other. That’s where Schema Builder comes in — a powerful, interactive tool that helps you visualize and modify your data model directly from the Salesforce setup.
In this blog, we’ll cover:
- What Schema Builder is
- Why it’s useful
- How to open and use it
- How to create fields and relationships using Schema Builder
- Diagram and practical example
- Benefits and limitations
What is Schema Builder in Salesforce?
Schema Builder is a graphical tool in Salesforce that lets you view, design, and modify objects and their relationships in one visual interface.
Instead of navigating through multiple pages in Object Manager, Schema Builder provides a drag-and-drop experience where you can:
- View standard and custom objects
- See all fields, relationships, and dependencies
- Create new fields or relationships visually
Think of it as a map of your data model — where every object (like Account, Contact, Opportunity) and its fields are connected for easy understanding.
Why Use Schema Builder?
If you’ve ever tried to understand how objects relate in Salesforce — like how an Opportunity connects to an Account or Contact — Schema Builder gives you that clarity instantly.
Key reasons to use it:
- Quickly visualize data relationships
- Add new fields without navigating to Object Manager
- Understand lookup and master-detail connections
- Save time in data model design and documentation
- Great for admins, architects, and developers alike
How to Open Schema Builder
Follow these steps to access it:
- Go to Setup in Salesforce.
- In the Quick Find box, type Schema Builder.
- Click on Schema Builder under Objects and Fields.
That’s it — the visual interface will open! You’ll see a canvas displaying objects, fields, and relationships.
Understanding the Schema Builder Interface
When you open Schema Builder, the interface has three main parts:
1. Canvas (Main Area)
This is where all your objects (like Account, Contact, Opportunity) are displayed visually.
- Each object appears as a box.
- Inside the box, you’ll see fields grouped by type (Standard Fields, Custom Fields, Relationship Fields).
- Arrows between objects represent relationships (Lookup or Master-Detail).
2. Element Palette (Left Sidebar)
Here you can drag and drop new elements such as:
- New Custom Field
- Lookup Relationship
- Master-Detail Relationship
3. Object List (Right Sidebar)
This section lets you:
- Show or hide specific objects
- Filter to display Standard, Custom, or Selected objects only
Creating Fields Using Schema Builder
You can create new fields directly in Schema Builder — without switching to Object Manager!
Example: Add a Custom Field to the Account object
- Open Schema Builder.
- Select Account from the right panel.
- Drag Number, Text, or any field type from the Elements tab onto the Account object.
- Define the Field Label, API Name, and other settings.
- Click Save.
Your new field is instantly added — both in Schema Builder and in the backend object definition.
Creating Relationships Between Objects
You can also establish Lookup or Master-Detail relationships directly in Schema Builder.
Example: Link a Custom Object “Project” to Account
- Open Schema Builder and display both Project and Account objects.
- From the Elements panel, drag Lookup Relationship onto the Project object.
- Choose Account as the related object.
- Save your changes.
Now, you’ll see an arrow between Project → Account, representing the relationship visually.
Diagram: Schema Builder Example
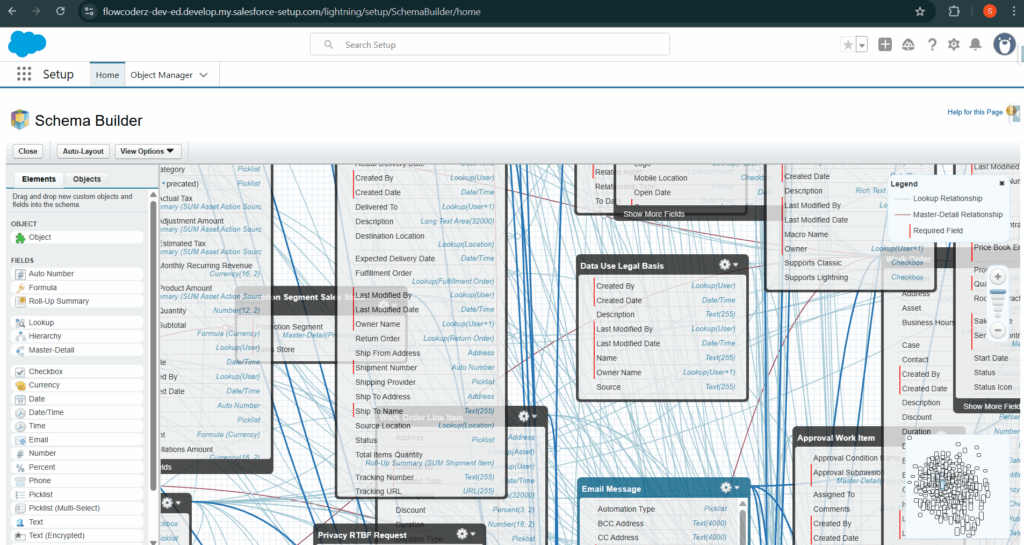
This is exactly how Salesforce displays it visually inside the Schema Builder canvas.
Real-World Use Case
Imagine you’re designing a custom Recruitment App in Salesforce with objects like:
- Job Position
- Candidate
- Interview
Using Schema Builder, you can:
- Create relationships between Candidate → Job Position
- Add a field like Interview Date on Interview
- See all relationships (who relates to whom) visually
This helps admins and developers quickly validate the design and share it with business teams.
Benefits of Using Schema Builder
- Ensures visual clarity of your data model
- Time-saving compared to Object Manager
- Easy drag-and-drop field creation
- No coding required
- Perfect for onboarding new admins
- Useful for documenting data architecture
Limitations of Schema Builder
- Can be slow in large Salesforce orgs with many objects
- Cannot create validation rules, triggers, or page layouts
- Doesn’t show field-level security or record types
- Best suited for data model visualization, not automation
Tips for Navigating Effectively
- Use Zoom and Pan tools to move around large schemas
- Use Filters to show only relevant objects
- Export a screenshot for documentation or presentations
- Keep the schema organized by hiding unused objects
Conclusion
Schema Builder is an essential Salesforce tool for anyone who wants to visualize and manage their org’s data model efficiently.
It’s perfect for:
- Visualizing object relationships
- Quickly adding fields or relationships
- Designing and communicating data models
By mastering Schema Builder, Salesforce Admins and Developers can design cleaner, scalable, and well-documented systems — all through an intuitive visual interface.
Pro Tip: Next time you’re planning a new object or integration, open Schema Builder first — it’ll save you hours of confusion later!